Export GoDaddy Emails to Office 365 Following Straight-Forward Method
Microsoft’s Office 365 subscription service has taken the world by storm – reason why users want to export GoDaddy emails to Office 365.
Many businesses and salaried persons who were earlier using different professional Email Hosting services are now willing to move to Office 365. Why? Because of its productivity tools like secure cloud storage, anywhere file accessibility, and automatic upgrades at predetermined intervals.
This makes them move towards services that offer them the same without the risk of losing any data. You may have arrived at this page after visiting many other websites that offered different methods to migrate emails from GoDaddy to Office 365 but the manual techniques are long & tiring and mostly geared towards a person having technical expertise.
So, what would someone who isn’t technically inclined do?
The problem is solved by the Office 365 Import Tool, it supports both the technical and non-technical individuals.
The exportation task can be performed in two simple stages-
Stage 1: Configuration and Exportation
Stage 1: How to Export GoDaddy Emails to Office 365 Via Configuration
For those who do not know how to configure the account, we are dividing this process in two parts i.e. Configuration and Exportation.
Part 1 – Configuring IMAP Account With Outlook
Follow the given steps-
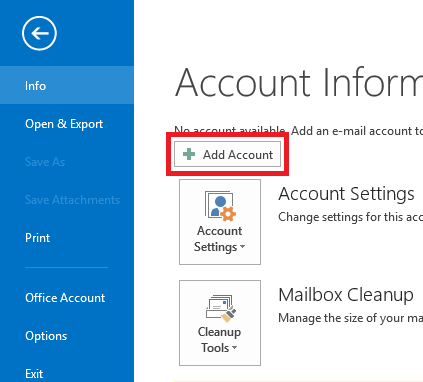
1. Launch MS Outlook and go to the File tab.
2. Choose the Add Account option from there.
3. Fill in the details like Name, Emails Address, Password etc.
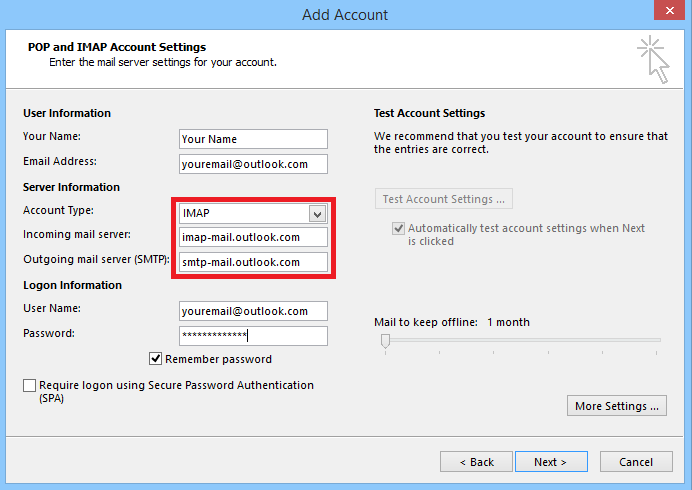
4. Press Next and go through the given instructions.
Part 2 – Exporting the data file in Outlook Supported Format
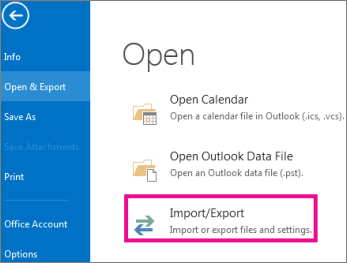
Step 1. Go to the File tab and choose the Open & Export option to start the process to migrate emails from GoDaddy to Office 365.
Step 2. From there, select the Import/Export option and a wizard will open up.
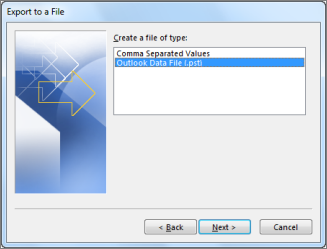
Step 3. In the Import & Export wizard, click on the Export to a file option and hit Next.
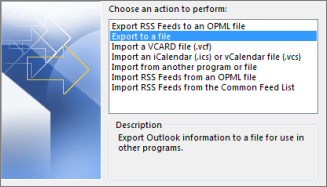
Step 4. Choose the Outlook Data File (.pst) option and press the Next button.
Step 5. Select the Include Subfolders option and hit Next.
Step 6. Browse for the location to save the exported file and press the Finish button.

Once the data file is configured and converted to PST format with Outlook, it can easily be exported to complete the procedure to export GoDaddy Emails to Office 365.
But, how to import the exported Outlook data file to Office 365? You might want to go with manual methods, but there are many complications with them.
Limitations of Manual Method to Import Outlook Data File
1. You might lose your data if any error occurs.
2. It is based on specific regions-if import PST services are not available in your region, you won’t be able to import the data.
3. You require admin permissions to perform the process.
4. With a manual process, you won’t be able to import any file more than 150 MB.
5. It is time-taking since it provides a speed of 16.7 MB/min or 24 GB per day.
Stage 2 – Migrate Emails from GoDaddy to Office 365 After Conversion
The above limitations of manual methods prove that it is better to go with a solution that is recommended by professionals who have already utilized it. That is why using the software mentioned in the beginning, is the desired option.
It has various features that benefits the users with an uncomplicated task that are going to be explained in the section after. First, find out the steps to perform the same operation.
Follow Steps of the Software to Import Converted Emails
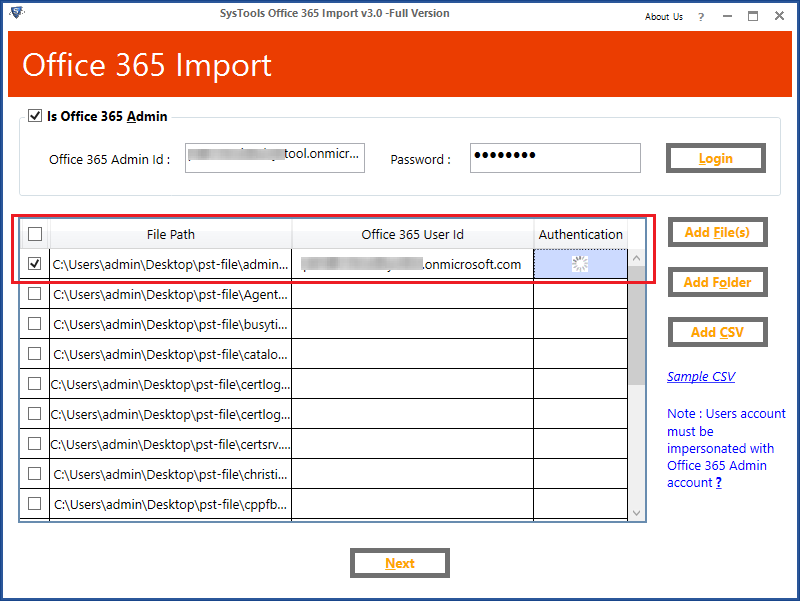
Step 1. Launch the software and fill in the credentials for the Office 365 account. Press Login to initiate the process to export GoDaddy emails to Office 365.

Step 2. Choose the Add Folder option and select the folder containing the files. Hit OK button and press Next.
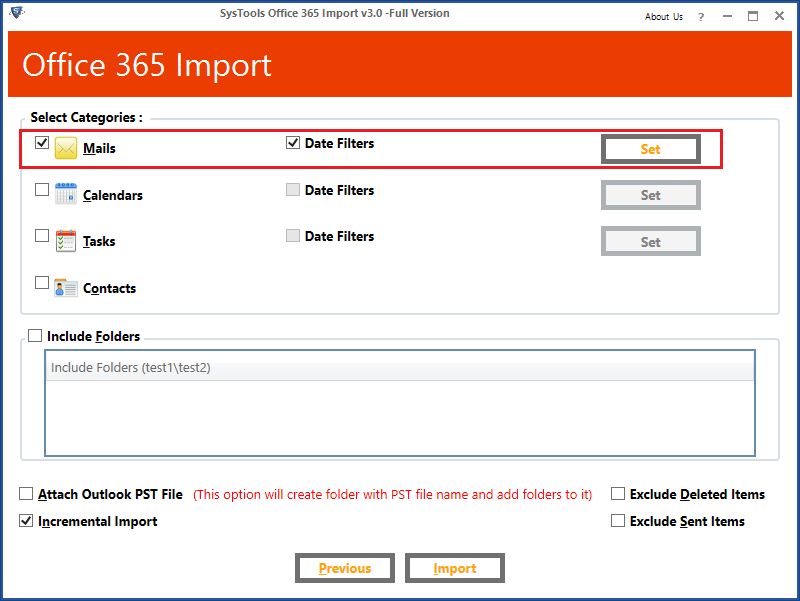
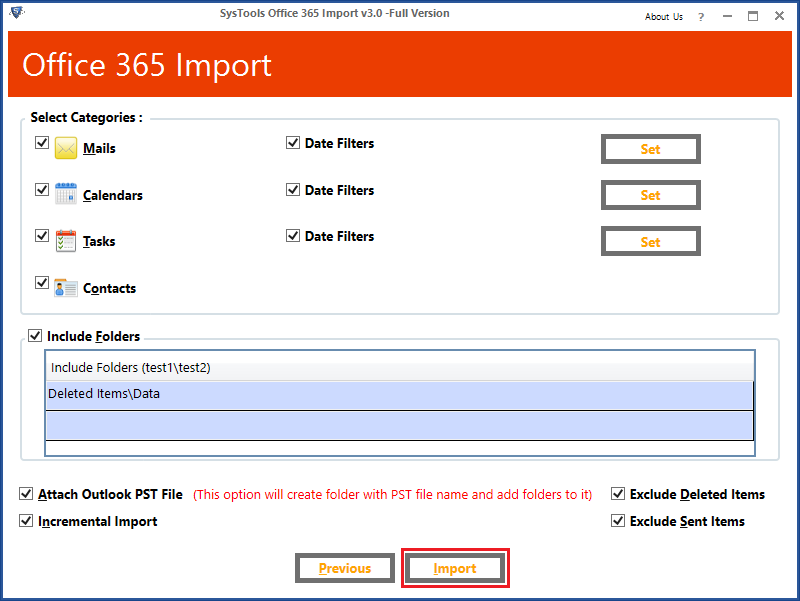
Step 3. You have an option to utilize the additional features the tool provides by marking the checkboxes against the categories and Date-Filters.
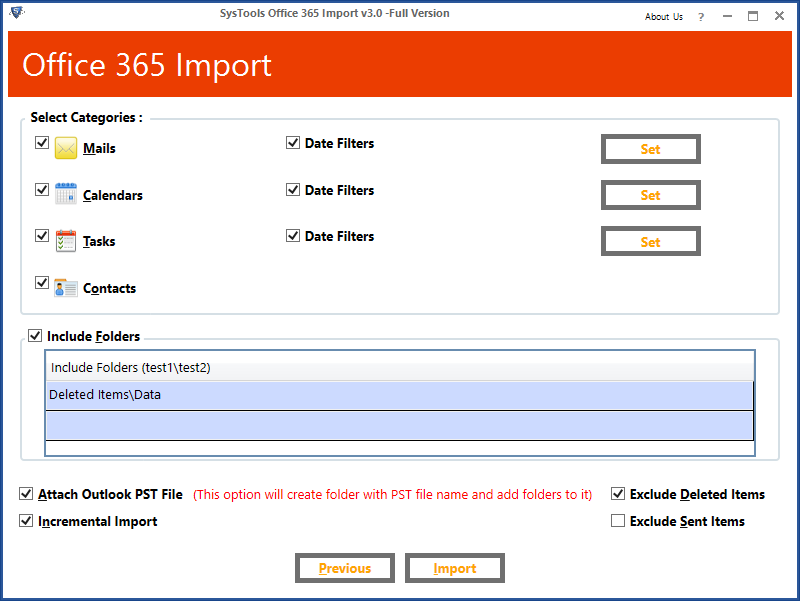
Step 4. Choose the Include Folders option and add the folder to it. Check the Attach Outlook PST File option.

Step 5. Select the Exclude Deleted Items and Exclude Sent Items option if required.
Step 6. At last, hit the Export button to complete the task to migrate emails from GoDaddy to Office 365.
But, What Are the Benefits of Using this Tool?
1. You can import large mailboxes and that too in bulk to Office 365.
2. Even if the email address and UPN ID are different, it will upload several files into Office 365 Outlook mailboxes.
3. The tool gives the user three different options-Add File, Add Folder, Add CSV (Comma Separated Values)
4. Incremental option allows the user to save space by avoiding duplication. After backing up the data once, the user gets the option to skip out on importing the already migrated data.
5. Date-wise filters grant users to the import selected data items with a specific time range.
6. It is compatible with all versions of Microsoft Outlook and the Windows operating system.
In Brief
Users will choose to export GoDaddy emails to Office 365 because of the intelligent and expanding features it provides. Unfortunately, the manual approach is difficult, time-consuming, and inefficient. However, the software as explained assists you in transferring data in two simple steps while ensuring data security.
About The Author
Kanika
Kanika Sarin is the Sr. IT Admin and handles the basic issues in the Mail Exchange Server. Having 10+ long years of involvement with Mail Backup tool advancements, you can ask her any queries and other technical issues in the remark box.